A Step-by-Step Guide: Applying Concrete Coatings
Concrete coatings are an excellent way to enhance the durability, appearance, and longevity of garage floors, patios, driveways, and other concrete surfaces. Whether you choose epoxy, polyurea, or another type of coating, proper application is key to achieving a long-lasting finish. Here’s a step-by-step guide to the professional concrete coating process.
Proper preparation is the most critical step in ensuring a strong bond between the coating and the concrete. This includes:
Step 2: Primer Application (If Needed)
Some coatings require a primer to improve adhesion and prevent moisture-related issues. The primer is applied evenly across the surface and allowed to cure before proceeding to the next step.
Step 3: Base Coat Application
The base coat is the first layer of the protective coating system. Depending on the chosen material (epoxy, polyurea, or polyaspartic), this coat is either rolled or sprayed onto the concrete surface. The Gorilla Coatings team ensures even coverage and the correct thickness of the right product for your surface, producing a durable, quality result.
Step 4: Decorative Additions (Optional)
For customized aesthetics, decorative elements can be added to the base coat. These may include:
Step 5: Top Coat Application
Once the base coat (and decorative elements, if used) has cured, a clear top coat is applied. This final layer provides:
Step 6: Curing & Final Inspection
Curing times vary depending on the coating type:
A final inspection ensures the coating is evenly applied, free of defects, and ready for use.
Applying a concrete coating is a detailed process that requires professional expertise for the best results. Proper surface preparation, quality materials, and skilled application all contribute to a durable, long-lasting finish. If you’re looking to upgrade your concrete floors with a high-performance coating, consider hiring our professional team at Gorilla Coatings to ensure the job is done right the first time!
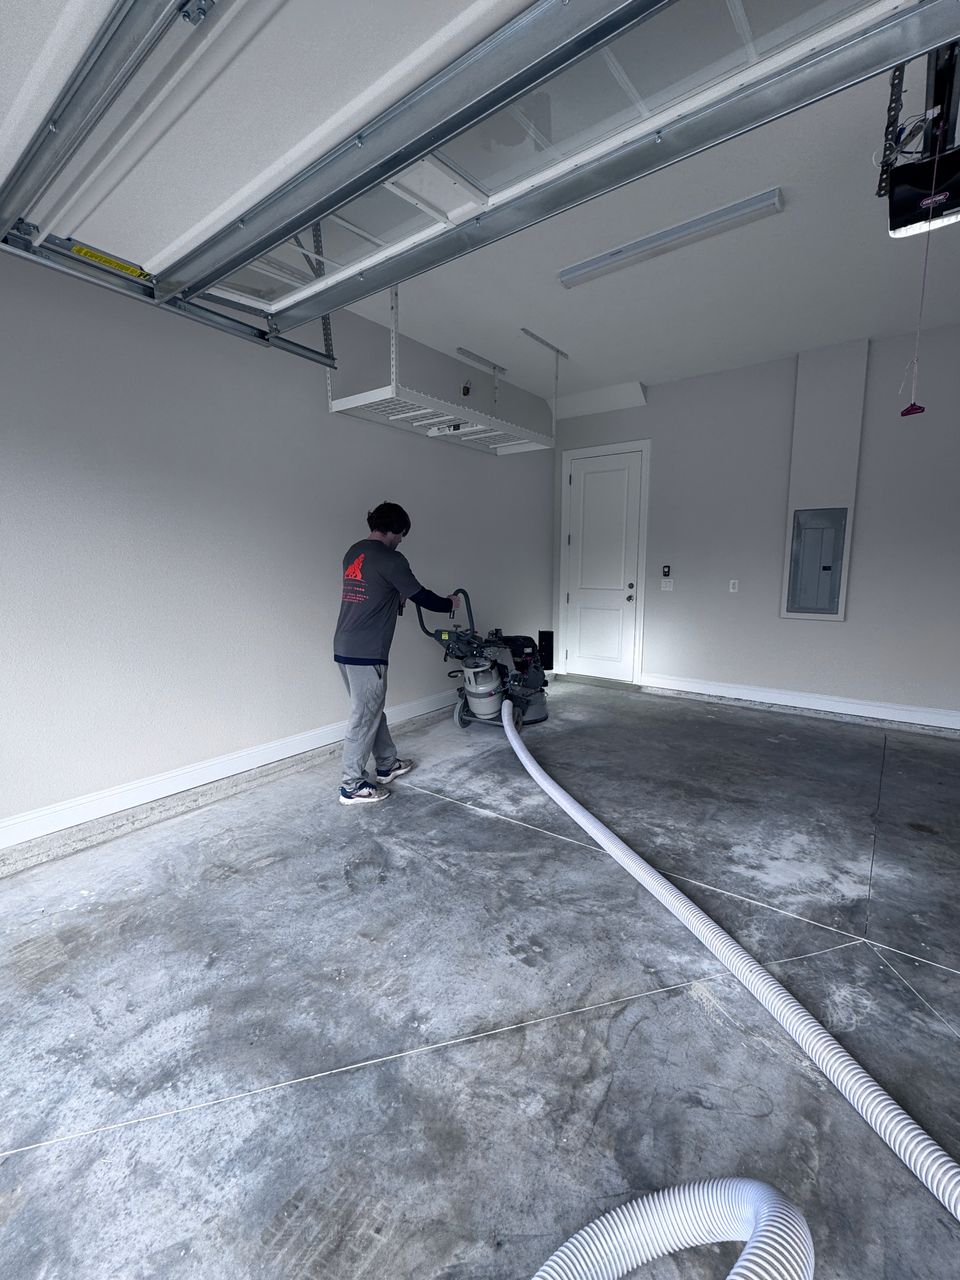
Step 1: Surface Preparation
Proper preparation is the most critical step in ensuring a strong bond between the coating and the concrete. This includes:
- Cleaning: The surface must be free of dirt, oil, grease, and other contaminants.
- Repairing Cracks and Damage: Any cracks, holes, or spalling areas are filled and leveled.
- Grinding or Etching: A diamond grinder or acid etching is used to create a rough surface profile that enhances adhesion.
- Vacuuming: The area is thoroughly vacuumed to remove dust and debris before coating application.
Step 2: Primer Application (If Needed)
Some coatings require a primer to improve adhesion and prevent moisture-related issues. The primer is applied evenly across the surface and allowed to cure before proceeding to the next step.
Step 3: Base Coat Application
The base coat is the first layer of the protective coating system. Depending on the chosen material (epoxy, polyurea, or polyaspartic), this coat is either rolled or sprayed onto the concrete surface. The Gorilla Coatings team ensures even coverage and the correct thickness of the right product for your surface, producing a durable, quality result.
Step 4: Decorative Additions (Optional)
For customized aesthetics, decorative elements can be added to the base coat. These may include:
- Color Flakes or Chips: Your selection is broadcasted onto the wet base coat for texture and visual appeal.
- Metallic Pigments: Pigments are swirled into the coating for a high-end, glossy finish.
- Quartz or Sand: Can be added for increased slip resistance and durability.
Step 5: Top Coat Application
Once the base coat (and decorative elements, if used) has cured, a clear top coat is applied. This final layer provides:
- UV Protection (for polyurea or polyaspartic coatings, preventing yellowing)
- Chemical and Stain Resistance (protects against spills, oil, and harsh chemicals)
- Scratch and Impact Resistance (adds an extra layer of durability)
Step 6: Curing & Final Inspection
Curing times vary depending on the coating type:
- Epoxy: Can take several days to fully cure.
- Polyurea and Polyaspartic: Typically cures within 24 hours.
A final inspection ensures the coating is evenly applied, free of defects, and ready for use.
Applying a concrete coating is a detailed process that requires professional expertise for the best results. Proper surface preparation, quality materials, and skilled application all contribute to a durable, long-lasting finish. If you’re looking to upgrade your concrete floors with a high-performance coating, consider hiring our professional team at Gorilla Coatings to ensure the job is done right the first time!